

How To Clean Quartz Countertop?
/
Quartz countertops are also popular in modern kitchens and bathrooms since they are so durable, low-maintenance, and very stylish. Since it is composed of natural quartz and resin, it does not stain or catch fire like many other materials. Quartz countertops are relatively low maintenance, yet they still require regular care and attention to remain beautiful. Quartz countertops cleaning includes removing tough stains, maintaining the top, and avoiding common cleaning mistakes.
How to clean quartz countertop? Here are some tips-
1. Daily Cleaning: Simple Steps for Maintenance: Cleaning your quartz countertop doesn't have to be so complicated. A few simple steps will keep it shiny and prevent dirt from accumulating.
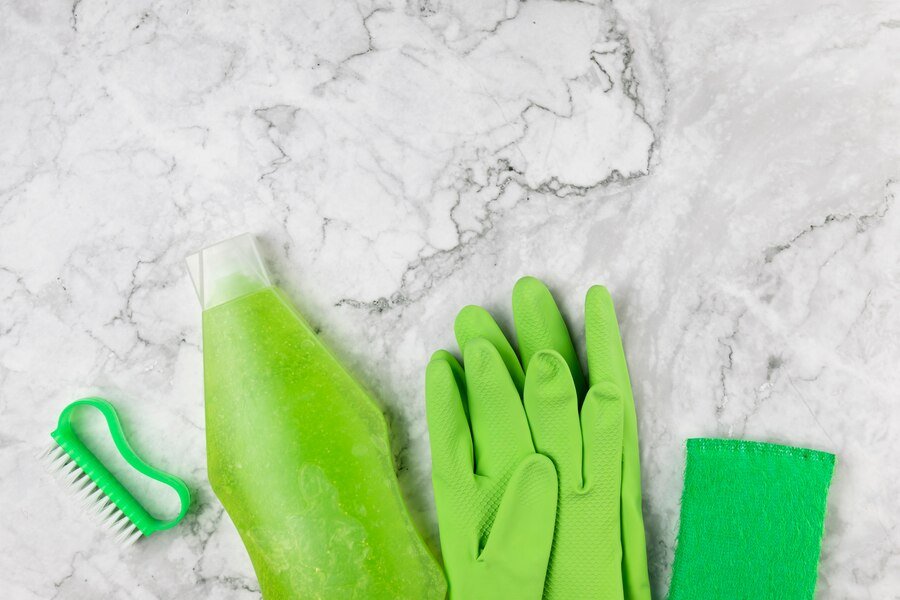
Materials needed:
Microfiber cloth or sponge
Warm water
Mild dish soap or pH-balanced cleaner
Mild, non-abrasive surface cleaner (if desired)
How to Clean:
Wipe the Surface: Use warm water and a microfiber cloth or sponge to clean your quartz countertop. It will be removing dust, crumbs, and slight spills.
Clean with Milder Soap: If a deeper clean is desired, put a small amount of mild dish soap or pH-balanced cleaner on the Surface. Use damp but mild scrubbing with the cloth to remove harsh dirt and grease.
Clean and Rinse: Finally, rinse the countertop with clean, fresh water and wipe it dry with a soft, clean towel or cloth. Dry your quartz countertop well to avoid water spots or streaks.

Why It Works: Quartz countertops have a non-porous feature, which means liquids and dirt can't penetrate or soak into the countertop surface. Thus, daily cleaning with mild soap and water will enable you to clean away surface debris without harming the stone or its resin binding.
Handling Stubborn Marks: How to Clean spills and marks
Although quartz is resistant to most stains, a few items, such as wine, coffee or acidic foods, can leave marks if not removed quickly. Removal of these stains is effortless if you know the correct approach.
Some Common Stains and How to Remove Them:
Food Stains (Oil, Coffee, Juice): Baking soda with water can be applied to remove oil and food stains. Mix it into a paste, use it in the stain area, and let it stay there for 10–15 minutes. Then rinse clean through the gentle scrubbing with a soft cloth or sponge.
Wine or Coffee Stains: Combine some dish soap in warm water if you find any wine or coffee stains. It would help if you blotted that stain using a soft cloth. It would help if you didn't scrub it because it will damage the Surface. For tougher marks, you might need a specialized quartz cleaner.
Ink or Marker Stains: Rub over the stains with a small amount of rubbing alcohol on a clean cloth. Do not rub too vigorously; that can damage the finish.
What Not to Use:
Aggressive Chemicals: Avoid using bleach, ammonia, or acidic cleaners like vinegar. These chemicals may break down parts of the resin in quartz, and you will see discoloration over time.
Abrasive Pads: Never use abrasive sponges or steel wool pads to scrub your quartz countertops. These can quickly leave scratches that become permanent marks.

Deep Cleaning: How to Restore Shine and Luster
For daily cleaning and cleaning up spills, you want to maintain the shine of your quartz countertop; however, to be more effective, you should do the deep cleaning now and then to clean off grime or oils that may have been built up on the countertop over time.
What You'll Need
None-abrasive, stone-safe cleaner or quartz-specific cleaner
Microfiber cloth
Water
Baking soda if needed
How to Deep Clean:
Apply Quartz Cleaner: For deep cleaning, you will need a non-abrasive, stone-safe cleaner. Spray a small amount over the countertop surface.
Buff the Surface: Using a clean microfiber cloth, buff the cleaner into the quartz in circular motions. This will help pick up deeper-set oils or grime accumulated with age.
Rinse and Dry: Rinse off the soap residue and clean the countertop with clean water and a soft cloth to avoid any streaks.
Tip: If you have a quartz countertop surface that accumulates a lot of grime and sticky residue, sprinkle a small amount of baking soda. Mix the baking soda into a paste-like consistency with water and scrub the area with a soft cloth before rinsing.
Damage-Free Quartz Countertops: Care Tips for Maintaining Long-Lived Quartz Countertops
Quartz has proved to be very resilient, but it still needs proper care to protect it so that the countertop stays in perfect look for a long time without long-term damage. Here are a few essential tips to keep your countertop looking its best for years to come:
Preventive Tips
Use trivets or hot pads: though quartz is incredibly heat-resistant, always use a trivet or a hot pad for pans, pots, or dishes hot out of the oven. Exposure to high heat for extended periods may cause discoloration or surface damage.
Avoid Cutting Directly on the Surface: Even though quartz is resistant to scratches, it's still recommended to use cutting boards when slicing and dicing. Cutting with sharp knives directly on the countertop can bring about tiny scratches that will reduce its lustre in due time.
Clean Spills Right Away: Quickly clean up spills, such as acidic products like lemon juice, vinegar, or wine, to prevent them from permanently staining or damaging the Surface.
Why These Tips Matter:
Preventing Damage Helps Your Countertop's Sleek Finish Remain Beautiful and Functional for Decades. You decrease your chances of wear and tear with protective tools and immediate clean-up of spills.
How to Clean Grout Near Quartz Counters
Cleaning the top Surface of your quartz countertop is only half the battle. If you're working with tile backsplash, you've also got grout along the edges of your countertop, and you want that to look clean. Grout dirties easily and can stain. Stains can even penetrate the grout if you let them. Therefore, cleaning grout regularly can keep it looking clean, fresh, and new.
Tips:
Apply Grout Cleaner: This applies to using a grout-specific cleaner or baking soda with water. There should be an application on the grout lines, and the grout should be scampered with an old toothbrush or grout brush.
Apply Grout Sealer: When you have grout lines, applying a sealer once a year will prevent stains and discoloration. It will also make cleaning much easier in the future.
Why is it Important?
Grout is rarely noticed but does make all the difference when it comes to keeping your kitchen or bathroom tidy-looking. Maintaining the grout will take care of your quartz countertops' appearance and ensure that the entire surface area looks clean and shiny.
Make Your Quartz Countertops Look Amazing
Cleaning and Maintenance of Your Quartz Countertops Never Need to be Painful or Lengthy. Proper care lets you keep countertops sparkling clean and free from stains or damage. The daily cleaning with mild soap and water solution, regular, thorough cleaning, and proper care will ensure that your quartz countertop stays beautiful and functional for years to come, provided that you do not expose the Surface to harsh chemicals, abrasives, or too much heat. With easy cleaning steps and care tips like those in the list below, your quartz countertops will continue to be a stunning focal point for your home.


